Pages

Wednesday, May 21, 2014

Monster of the Week: Collaging

Hey there! Apologies for going dark for a while-- I was completing my first year of college and moving back home to Maryland. It feels great to be back.
I've decided this will be the first post of a weekly installment called Monster of the Week. Monster of the Week is one of my favorite terms to reference a TV trope in which the protagonists deal with a "whatever" monster & is eradicated by the end of the episode. I first heard it in relation to the X-Files (one of my favorite shows!) and originally wanted to name this blog Monster of the Week! Anyways, since I love the Monster of the Week episodes best in most of the TV shows I watch, I decided that this category of postings wouldn't have a negative connotation. MOTW will just be an update on something I'm obsessing over for the week.

Onto collaging!


Collaging is one of my favorite stress relievers, and once I discovered what could be accomplished with Mod Podge, my collaging life got so much better. A few brush strokes and your masterpiece is sealed forever! Like a blood pact, but with $8 glue and some paper. I also use the bottles to prop my window open in the summertime.

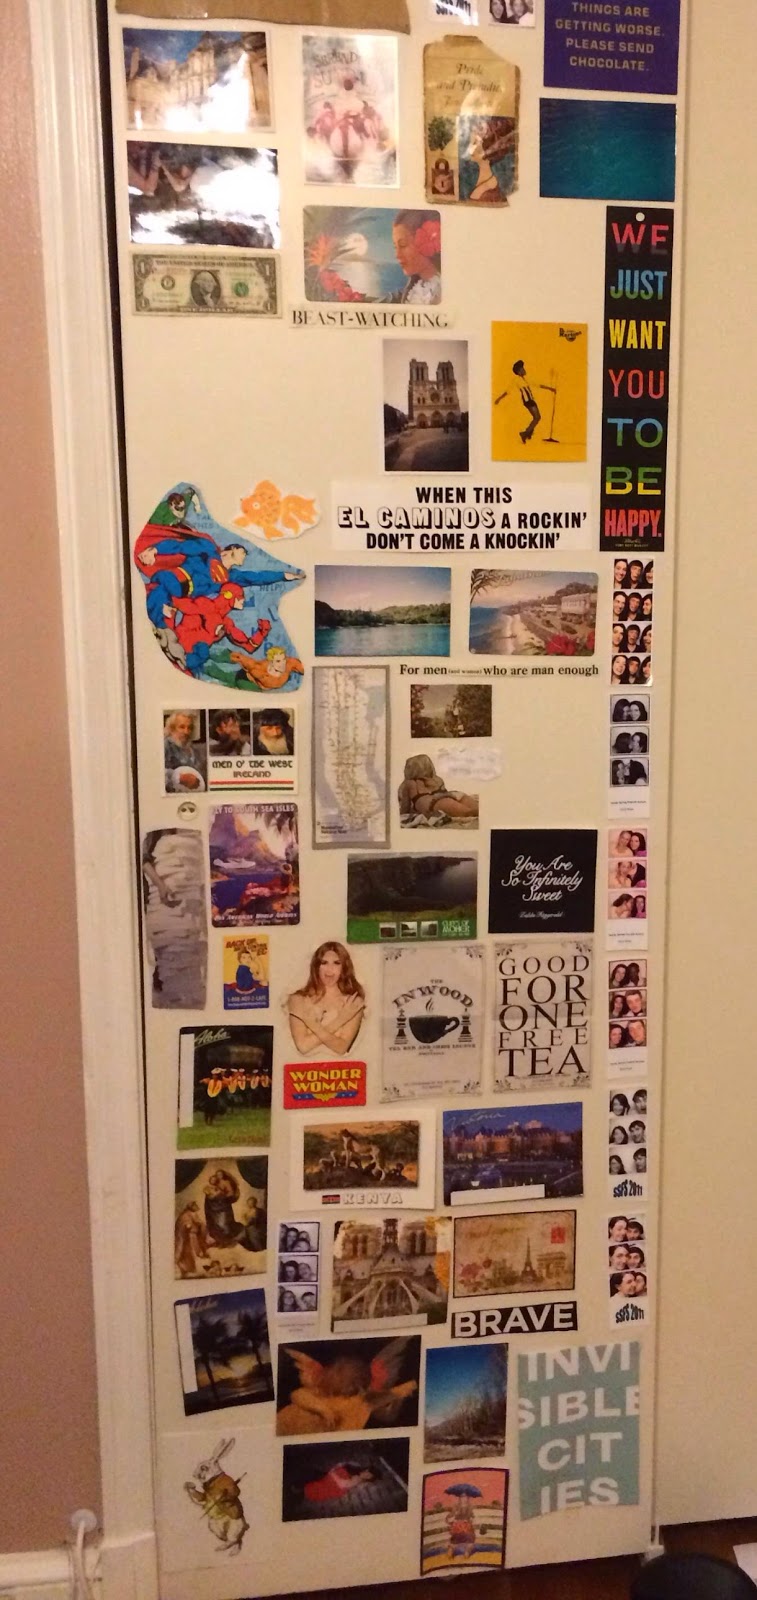
I'm one of those people who's really into artsy clutter, and can't have bare walls ever. The space above my desk always turns into a collage of sorts. Here's my closet door, currently missing a few pieces I took to college:


The thing I find most relaxing and satisfying about collaging is that it's hard, consuming work, but can be done while watching Netflix (the X-Files maybe?). Better yet, you get a piece of art or an updated item afterwards!
Here are some of my high school notebooks, pre-Mod Podge, inspired by a friend at a summer writing program.


Here's one of my craft/knitting boxes made with comic book panels from a few different books taken out of context, and a jar I use to hold some makeup brushes, done with passages from a French workbook on Le Petit Prince.


A lot of these were made using really cheap items-- used book stores will have comics, magazines and maps for about 75 cents each. I got my hands on some Holiday magazines from the 60s and 70s while at that writing program, and I'll probably keep using them until they're nothing but sad little spines. I'll use those too, come to think of it.

Collaging is great because it can last as long as you want it to, and be as easy or hard as you want it to as well, and each one can have a mood. A friend and I did these in about three hours one night, and the next one took about half an hour, sitting on my bed in front of Netflix.


I hope this was inspirational, fun to read, or just some nice eye candy. 
Do your thing, and treat yourself to some papery goodness!
xx,

Sunday, May 11, 2014

The Pin-Ups Are Jealous: Cat Eye Tutorial & Tips

Let's talk about one of my favorite products: eyeliner! It comes in an array of forms (pencil, gel, liquid, cream) and can change a look entirely. Once I started wearing eyeliner I couldn't go back-- I totally get why it's been a beauty staple throughout history. My favorite look is the classic cat eye, but it can be a little tricky to get the hang of.


Today I used the first gel liner I ever bought, by Mommy Makeup in Black Orchid, along with my SHANY eyeliner brush (it came in a 12-piece set, and is brush number 4). I love this color because it's a deep metallic purply color that isn't especially harsh and reminds me of autumn. It also goes on incredibly smooth. Let' get started!


 If you're wearing eyeshadow and plan on wearing mascara, apply the eyeliner in between those two steps. Eyeshadow would smudge and cover your hard work if you applied it after your eyeliner, and it's difficult to apply eyeliner when your voluminous lashes are blocking your view. First step, use your brush or pencil (I recommend using a liquid, gel, or cream liner for a really precise cat eye) to apply a line of your desired thickness along your upper lash line. Take it slow, and remember to breathe! Just like yoga.

Your lower lash line is an excellent guide for deciding what kind of angle you want for your wing. Draw the base of your wing as if you were drawing a continuation of your lower lash line if you're unsure what angle you'd like. The one I did here doesn't exactly follow this, but as long as it's not pointing downward, I think I'm safe.


Here's where it all comes together! The width of the line you drew in the first step will affect the thickness of your wing. Draw a third line, connecting the tip of your wing to your lash line. This piece may take some practice, but once you get it down, it's worth it. Next, fill in the space left, and you're done!

Mascara is next! 
What's your favorite kind of eyeliner? Do you have a look you love?
xx,


Maiden Voyage

Hello! I'm Carson. I'm 18, and currently go to school in Washington State, but my family lives in Maryland. I've admired beauty and DIY blogs for a few years, love recreating what I see, and then telling everyone about it, so this blog was inevitable. My goals are to create a space where I can share what I know about beauty, crafts, music, and television, and learn at the same time--thank you so much for joining me! Are you ready?
xx,